Diagonal Knit Look Crochet Beanie: Free Beginner Pattern
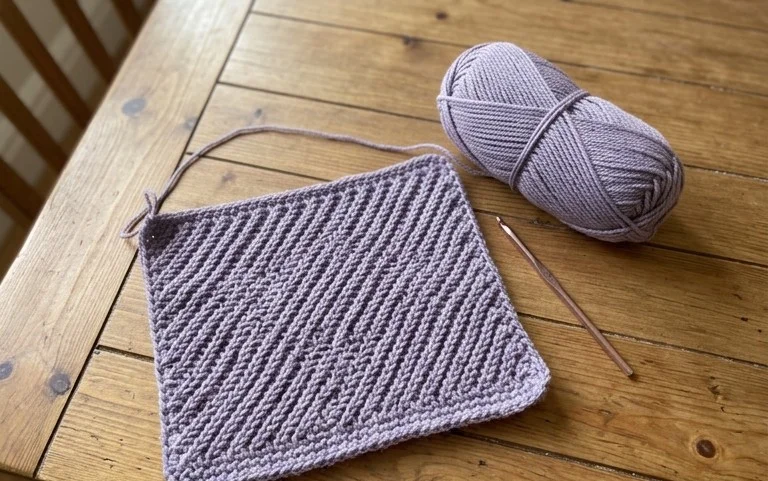
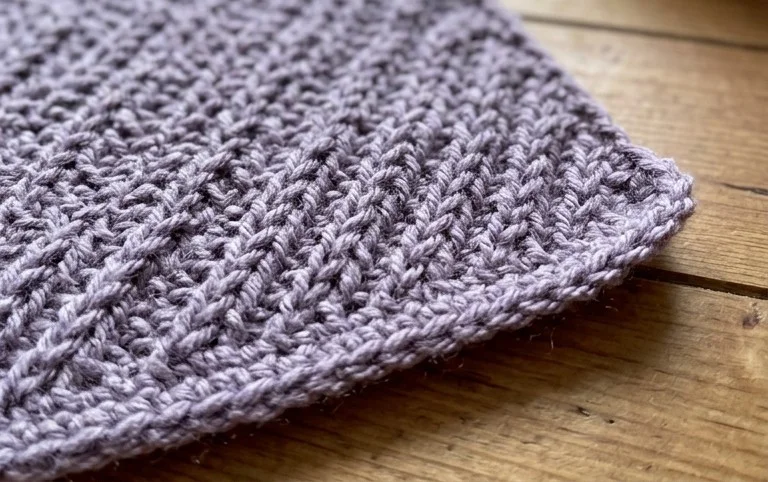
This slanted ribbing captures the soft, dense aesthetic of a store-bought winter accessory while using only a basic crochet hook. You will find that working these stitches creates a surprisingly stretchy fabric that holds its shape well after repeated wears, making it a reliable staple for cold mornings. Beginners appreciate how the repeating pattern builds muscle memory quickly, while experienced makers enjoy the rhythmic, meditative process of crafting a custom piece in just a few hours. By focusing on the back-loop technique, you create an angled texture that elevates the look of standard yarn. This project serves as a satisfying introduction to creating professional-grade accessories through simple, flat rectangular construction and assembly.
Why You’ll Love This Pattern
This crochet ribbed beanie pattern utilizes a simple rectangular construction worked in back-loop-only single crochet stitches, which mimics the look of professional knit ribbing. Because it is worked flat and then seamed, you do not need to manage complex circular tension, making it an excellent choice for a focused afternoon project. The stretchy texture provides a comfortable, snug fit that accommodates various head sizes easily. Using a heavy worsted weight yarn ensures the fabric remains thick and warm for colder months while maintaining a quick pace for the maker.
I finished this hat in one evening while watching a movie. The instructions were very easy to follow and the finished result looks like something I would have spent a lot of money on at a boutique shop.
— Sarah, hobbyist crocheter
Pattern Overview & Skill Level
- Skill Level: Beginner
- Approximate Time: 3 to 4 hours
- Construction: Worked flat in rows, then seamed to form a tube and cinched at the top
- Finished Dimensions: 9 inches tall by 8.5 inches wide when flat (fits standard adult head circumference of 21–23 inches)
Materials & Supplies Needed
- Yarn: Worsted weight (#4), 100% acrylic or wool blend, approximately 200 yards.
- Hook Size: 5.5 mm (US I-9).
- Notions: Yarn needle with a large eye, stitch markers, and a pair of sharp scissors.
- Safe Yarn Substitutions: You may use a light chunky weight (#5) for a faster, denser hat, but you must reduce the foundation chain by 5 stitches to account for the increased gauge. If using a thinner cotton yarn, the hat will lack elasticity, so consider adding 10 stitches to the starting chain.
Stitch Guide & Abbreviations (US Terms)
- ch = chain
- sc = single crochet
- BLO = back loop only (insert hook under the back loop of the stitch instead of both loops to create ribbing texture)
- sl st = slip stitch
- st/sts = stitch/stitches
- RS = right side
- WS = wrong side
Step-by-Step Pattern Instructions
Hat Body
The entire hat is worked back and forth in rows. The turning chain does not count as a stitch.
- Row 1: Ch 46. Sc in the second ch from the hook and in every ch across. (45 sts)
- Row 2: Ch 1, turn. Sc in BLO of each st across. (45 sts)
- Rows 3–60: Repeat Row 2 until the piece measures approximately 17 inches in length when pulled slightly. Ensure you maintain the same tension throughout to keep the edges straight. (45 sts)
Assembly and Finishing
- Seaming: Fold the rectangle in half, matching the short ends together. Join the edges using a sl st seam, working through the BLO of the starting row and the back loop of the current row to create a seamless-looking transition. Fasten off, leaving an 8-inch yarn tail.
- Cinched Top: Thread your tapestry needle with the long tail. Weave the yarn in and out along the top edge of the tube. Pull the yarn tail tightly to close the hole at the top of the hat. Secure the knot firmly on the inside.
- Finishing: Turn the hat inside out so the seam sits on the interior. Weave in all remaining loose ends securely.
Care & Washing Instructions
- Hand wash your finished hat in cool water with a gentle detergent to maintain the integrity of the fibers.
- Avoid using a dryer; lay the item flat on a towel away from direct heat sources to prevent stretching or felting.
- Reshape the hat while it is damp to ensure the ribbed texture stays defined and the circumference remains consistent.
Pro Tips & Common Mistakes to Avoid
Consistent tension is vital for this pattern; if your stitches are too tight, the hat will lose its elasticity and fit poorly. Use a stitch marker on the first stitch of every row to ensure you do not accidentally skip the final stitch, which would cause the hat to become trapezoidal rather than rectangular. When weaving in ends, carry the yarn tail through the interior of the ribbing rows for three inches to hide it completely and prevent unraveling. If you wish to make the hat larger, simply add stitches to your starting chain in increments of 5, but keep in mind this will require more yarn.
Frequently Asked Questions
Can I use a different yarn weight for this pattern?
Yes, but you will need to adjust your starting chain length to match the desired height of the hat and ensure the gauge reflects the thickness of your chosen yarn.
Is this project suitable for a complete beginner?
This pattern is perfect for beginners as it only uses single crochet stitches and teaches the technique of working in the back loop to create texture.
How do I know if the hat will fit correctly?
Standard adult hats should have about 2 inches of negative ease, meaning the hat should be slightly smaller than the head circumference to stay securely in place.
Can I sell items made from this pattern?
You are welcome to sell finished items created from this pattern, provided you credit the original design and use your own photography for the product listings.
You now have a warm, stylish hat that mimics the visual appeal of a knitted garment without needing a pair of needles. Try working this pattern in a variegated yarn to add a unique visual depth to the slanted texture, or adjust the starting chain length if you want to create a slightly slouchier silhouette for a casual outfit. Post a photo of your completed project on your favorite social media platforms so we can see how your color choices turned out. Browse the rest of the blog for more free patterns to fill your handmade wardrobe throughout the year.